Have you ever envisioned a personalized sound system, perfectly tailored to your aesthetic and acoustic preferences? While the market is flooded with Bluetooth speakers, building your own offers an unmatched sense of accomplishment and the freedom to create something truly unique. This comprehensive guide will walk you through every step of constructing a DIY Bluetooth speaker from scratch, equipping you with the knowledge to craft a high-quality, custom audio experience that reflects your passion for sound and electronics. Get ready to transform components into a portable masterpiece.
Popular Approaches to DIY Bluetooth Speaker Builds
Building a Bluetooth speaker from scratch offers incredible flexibility in design and functionality. Depending on your primary use and skill level, you can choose from several popular approaches, each with its own set of advantages and considerations.
Portable DIY Bluetooth Speakers
|
Our Picks for the Best Bluetooth speaker in 2026
As an Amazon Associate I earn from qualifying purchases.
|
||
| Num | Product | Action |
|---|---|---|
| 1 | Anker Soundcore 2 Portable Bluetooth Speaker with Stereo Sound, Bluetooth 5, Bassup, IPX7 Waterproof, 24-Hour Playtime, Wireless, Speaker for Home, Outdoors, Travel |

|
| 2 | Anker Soundcore 2 Portable Bluetooth Speaker with Stereo Sound, Bluetooth 5, Bassup, IPX7 Waterproof, 24-Hour Playtime, Wireless, Speaker for Home, Outdoors, Travel |
|
| 3 | Bluetooth Speaker with HD Sound, Portable Wireless, IPX5 Waterproof, Up to 20H Playtime, TWS Pairing, BT5.3, for Home/Party/Outdoor/Beach, Electronic Gadgets, Birthday Gift (Black) |
|
| 4 | Bluetooth Speaker with HD Sound, Portable Wireless, IPX5 Waterproof, Up to 20H Playtime, TWS Pairing, BT5.3, for Home/Party/Outdoor/Beach, Electronic Gadgets, Birthday Gift (Blue) |
|
| 5 | Bluetooth Speaker with HD Sound, Portable Wireless, IPX5 Waterproof, Up to 20H Playtime, TWS Pairing, BT5.3, for Home/Party/Outdoor/Beach, Electronic Gadgets, Birthday Gift (Teal) |
|
| 6 | Anker Soundcore 2 Portable Bluetooth Speaker with Stereo Sound, Bluetooth 5, Bassup, IPX7 Waterproof, 24-Hour Playtime, Wireless, Speaker for Home, Outdoors, Travel- Navy Blue |
|
| 7 | Bluetooth Speaker with HD Sound, Portable Wireless, IPX5 Waterproof, Up to 20H Playtime, TWS Pairing, BT5.3, for Home/Party/Outdoor/Beach, Electronic Gadgets, Birthday Gift (Pink) |
|
| 8 | Anker Soundcore 2 Portable Bluetooth Speaker with Stereo Sound, Bluetooth 5, Bassup, IPX7 Waterproof, 24-Hour Playtime, Wireless, Speaker for Home, Outdoors, Travel |
|
| 9 | Bluetooth Speaker with HD Sound, Portable Wireless, IPX5 Waterproof, Up to 20H Playtime, TWS Pairing, BT5.3, for Home/Party/Outdoor/Beach, Electronic Gadgets, Birthday Gift (Red) |
|
| 10 | Soundcore Anker 2 Portable Bluetooth Speaker with Stereo Sound, Bluetooth 5, Bassup, IPX7 Waterproof, 24-Hour Playtime, Wireless, Speaker for Home, Outdoors, Travel |
|
Portable DIY Bluetooth speakers are designed for music on the go. These projects prioritize compact size, durable enclosures, and robust battery life, making them ideal companions for outdoor adventures, picnics, or moving between rooms. Key features to consider include a strong, lightweight enclosure material like plywood or even repurposed items, an efficient Class-D amplifier to maximize battery runtime, and a reliable battery management system for safe charging and discharging. The focus here is on achieving good sound in a small, self-contained package.
Desktop DIY Bluetooth Speakers
For those who prioritize superior sound quality in a stationary setting, desktop DIY Bluetooth speakers offer more room for larger drivers, sophisticated amplifier setups, and acoustically optimized enclosures. These builds typically don’t require the same level of battery optimization but benefit from a stable power supply and potentially more complex crossover networks for multi-driver systems. High-fidelity drivers and a well-sealed, rigid enclosure are paramount to achieving rich, clear audio, making them perfect for a home office, workshop, or living space.
Rugged and Repurposed DIY Bluetooth Speakers
If you’re looking for a project with character or one that can withstand the elements, rugged or repurposed DIY Bluetooth speakers are an exciting challenge. This approach often involves converting existing containers—such as old ammunition boxes, toolboxes, or even vintage radios—into functional speakers. When designing a rugged speaker, special attention must be paid to sealing the enclosure against moisture and dust, perhaps even aiming for a basic IPX rating through careful gasket placement and silicone seals. Sound exciters, which vibrate a surface to produce sound, can also be a creative alternative to traditional drivers, simplifying the enclosure design by eliminating the need for precise speaker cutouts.
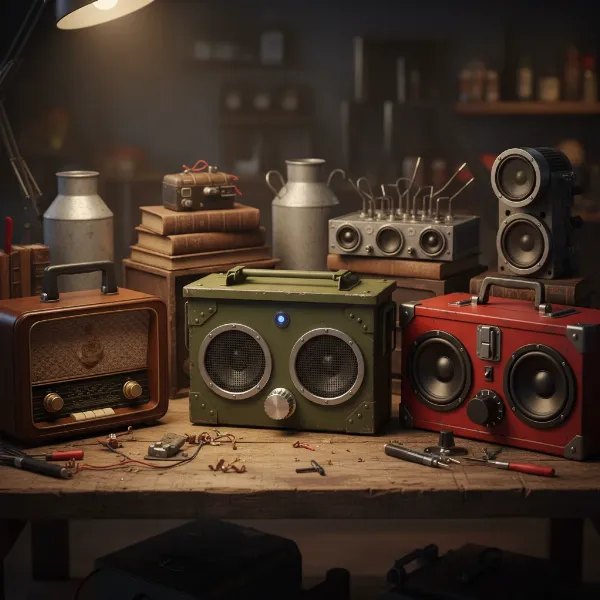 Variety of DIY rugged and repurposed Bluetooth speaker designs from unique enclosures.
DIY Bluetooth Speaker Component Selection Guide
Choosing the right components is the foundation of a successful DIY Bluetooth speaker build. Your selections will directly impact sound quality, battery life, portability, and overall cost.
Determine Your Project Goals
Before diving into component shopping, clearly define what you want your DIY Bluetooth speaker to achieve:
- Purpose: Will it be a small, ultra-portable unit for hiking, a powerful desktop system for home listening, or a rugged outdoor companion?
- Budget: DIY projects can range from under $50 for basic builds to several hundred for high-fidelity systems. Set a realistic budget to guide your component choices.
- Desired Features: Do you need exceptional bass, long battery life, water resistance, a volume knob, or perhaps a USB charging port for your devices?
Key Components to Consider
Speaker Drivers
The drivers are where the sound comes from.
- Full-Range vs. 2-Way: Full-range drivers simplify wiring as they cover most of the audio spectrum, eliminating the need for a complex crossover. 2-way systems (woofer + tweeter) offer better sound separation and clarity but require a crossover.
- Impedance (Ohms): Most common are 4-ohm or 8-ohm speakers. Ensure your amplifier can support the chosen impedance.
- Sensitivity (dB): Higher sensitivity means the speaker will play louder with less power, conserving battery life.
- Power Handling (Watts): Match this to your amplifier’s output to prevent damage and ensure optimal performance.
- Thiele-Small Parameters: For advanced builders, these parameters are crucial for designing an acoustically optimized enclosure.
Amplifier Module
The amplifier boosts the audio signal to power your speakers.
- Class-D Amplifiers: Highly recommended for portable DIY speakers due to their high efficiency, which translates to longer battery life and less heat generation.
- Power Output: Measured in watts per channel (WPC). Choose an amplifier that provides enough power for your speakers without clipping or distortion at desired volumes.
- Voltage Requirements: Ensure your battery system can supply the necessary voltage.
- Integrated vs. Separate Bluetooth: Many amplifier boards now come with integrated Bluetooth, simplifying wiring. Separate modules offer more flexibility but add complexity.
Bluetooth Module
This component allows wireless connection to your devices.
- Integrated vs. Separate: Integrated modules are convenient. Separate modules (often 5V) might require a voltage regulator if powered by a higher voltage battery system.
- Bluetooth Version: Newer versions (e.g., 5.0 and above) offer better range, faster pairing, and improved power efficiency.
- Antenna: For enclosures made of metal, an external antenna might be necessary to improve Bluetooth range.
Battery System
For portable designs, a reliable power source is crucial.
- Li-ion 18650 Cells: These are popular due to their high energy density and widespread availability. Always use cells of the same model and from reliable sellers.
- Series (S) and Parallel (P) Connections:
- Series: Increases voltage (e.g., four 3.7V cells in series make a 14.8V nominal pack).
- Parallel: Increases capacity (mAh) and current capability (e.g., two 3500mAh cells in parallel make a 7000mAh module).
- Battery Management System (BMS): Absolutely essential for Li-ion safety. A BMS protects against overcharging, over-discharging, and short circuits. Opt for a BMS with balance charging to prolong battery life.
- Charger: A “cc-cv” (constant current, constant voltage) charger specifically designed for Li-ion batteries and matching your pack’s series configuration (e.g., a 4S charger for a 4S battery pack).
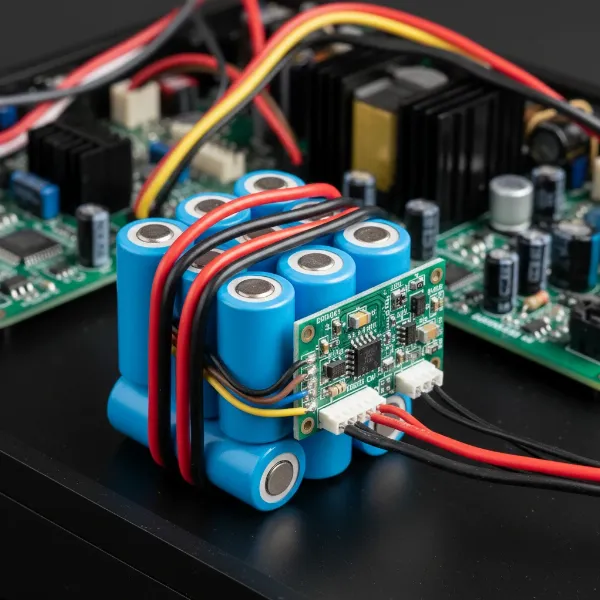 Close-up of lithium-ion 18650 battery cells wired to a Battery Management System.
Enclosure Materials
The enclosure significantly impacts sound quality and durability.
- Plywood or MDF: Excellent for acoustic performance due to their rigidity. Plywood offers a good balance of stiffness and weight for portable designs. MDF needs sealing to protect against moisture.
- Repurposed Materials: Metal (like ammo boxes) requires internal wooden boxes to prevent vibrations and can act as a Faraday cage, potentially reducing Bluetooth range. Plastic can also work but may vibrate if thin.
- Sealing: Air leaks can degrade sound. Use wood glue, silicone, or hot glue to seal all joints.
Connectivity and Additional Features
Consider these for enhanced usability:
- AUX Input: A 3.5mm jack for wired connections.
- USB Port: For charging external devices (requires a boost converter if your battery voltage is too low).
- Volume Knob: An audio taper potentiometer wired to the amplifier.
- Power Switch: A simple on/off switch rated for your battery’s voltage and current.
- LED Indicators: For power, Bluetooth status, or battery capacity.
- Ground Loop Isolator (GLI): A vital component if you experience a buzzing sound, especially when the amplifier and Bluetooth module share a power source.
DIY Bluetooth Speaker Component Comparison
Choosing the right components involves understanding their roles and potential variations. Here’s a comparison to help guide your selections:
| Component Type | Key Features | Considerations for DIY | Pros in DIY | Cons in DIY |
|---|---|---|---|---|
| Amplifier Module | Class-D, 2x50W @ 4 Ohm, 12-24V input | Match power to speakers, voltage to battery | High efficiency, compact size, various power levels | Can introduce “pop” noise on startup if cheap |
| Bluetooth Module | Bluetooth 5.0, range up to 10m, 5V | Integrated with amp board vs. standalone | Seamless wireless audio, simple pairing | Can be limited by enclosure material (metal) |
| Speaker Drivers | Full-range, 4-8 Ohm impedance, 3-6 inch | Determine based on desired sound, enclosure size | Simplified wiring (full-range), customizable sound | Requires careful enclosure design for optimal performance |
| Battery Cells | 18650 Li-ion, 2000-3500mAh | Choose reliable, high-discharge cells, match capacity | High energy density, rechargeable, long runtime | Requires BMS for safety, specific charging protocol |
| BMS (Battery Management System) | 3S/4S/5S protection, balance charging | Match ‘S’ rating to your battery pack configuration | Essential safety for Li-ion, prolongs battery life | Adds complexity to wiring, another component to source |
| Enclosure Material | Plywood (10-20mm), MDF, Repurposed | Stiffness, weight, acoustic properties, sealability | Customizable aesthetics, unique designs | Requires tools for cutting/shaping, acoustic knowledge |
Top DIY Bluetooth Speaker Project Tiers by Budget
Building a DIY Bluetooth speaker doesn’t have to break the bank. You can scale your project to fit various budgets while still achieving impressive results.
Budget-Friendly (Under $50)
For beginners or those on a tight budget, the focus is on reusing materials and selecting cost-effective components.
- Speakers: Salvage full-range speakers from old car audio systems, existing small stereo units, or even old headphones. Ensure they are 4-ohm.
- Amplifier & Bluetooth: Look for all-in-one Bluetooth amplifier modules, often available for under $15-$20, which combine both functions.
- Battery: Repurpose old laptop battery cells (18650s) after carefully testing their capacity, or use a small USB power bank with a step-up converter if needed. A basic BMS is still recommended.
- Enclosure: Get creative with repurposed items like cigar boxes, PVC pipes, plastic containers, or scrap wood. Minimal tools are required for cutting and assembly.
- Pros: Very low cost, excellent for learning basic electronics, highly customizable aesthetics.
- Cons: Sound quality may be limited, battery life might be shorter, assembly can be more challenging with salvaged parts.
Mid-Range ( $50 – $150)
This tier allows for better quality components and a more refined build without excessive cost.
- Speakers: Invest in dedicated 3-4 inch full-range drivers or a simple 2-way component set with basic crossovers.
- Amplifier & Bluetooth: A TPA3116 or TPA3118 based amplifier board, often with integrated Bluetooth, provides good power and efficiency. Consider one with tone controls.
- Battery: Purchase new, reputable 18650 Li-ion cells (e.g., 2S1P to 4S2P configuration) with a matching BMS and a dedicated Li-ion charger.
- Enclosure: Build a custom enclosure from plywood (10-15mm) or MDF, allowing for better acoustic tuning and a more professional finish. You’ll need basic woodworking tools.
- Pros: Significantly improved sound quality and battery life, more reliable components, opportunities for a cleaner build.
- Cons: Requires more specific tools (soldering iron, drill, jigsaw), slightly more complex wiring.
High-End/Advanced (Over $150)
For audiophiles or experienced DIYers, this tier allows for premium components and advanced design techniques.
- Speakers: High-fidelity drivers, potentially a 2-way or 2.1 (stereo + subwoofer) system with custom-designed passive or active crossovers.
- Amplifier & Bluetooth: Higher-power Class-D amplifiers (e.g., TPA3116D2 based boards for 2.1 systems), often paired with a separate, high-quality Bluetooth receiver for optimal signal clarity.
- Battery: Larger Li-ion battery packs (e.g., 4S2P or more) using high-capacity, high-discharge cells, a robust BMS, and a fast charger.
- Enclosure: Acoustically optimized, rigid enclosures made from thicker plywood (18-20mm) or MDF, potentially with internal bracing, bass reflex ports, and professional finishes (veneer, paint).
- Pros: Exceptional sound quality, long battery life, advanced features, highly durable and professional-looking build.
- Cons: Higher cost, requires advanced electronic and woodworking skills, potential for complex calculations (e.g., port tuning, crossover design).
Tips for Building and Maintaining Your DIY Bluetooth Speaker
Building a DIY Bluetooth speaker is a rewarding process, but attention to detail, safety, and proper maintenance are key to its longevity and performance.
Essential Tools and Safety Precautions
Before you begin, gather the necessary tools and prioritize safety:
- Tools: A soldering iron and solder, wire strippers/cutters, a multimeter (essential for testing voltage and continuity), a drill with various bits, screwdrivers, wood glue, clamps, and potentially a jigsaw or other woodworking tools.
- Safety: Always work in a well-ventilated area, especially when soldering. Wear safety glasses to protect your eyes. Be extremely cautious when working with lithium-ion batteries; never short-circuit them, puncture them, or expose them to extreme heat. Ensure your power supply is disconnected before making or changing any electrical connections.
Step-by-Step Assembly Guide
- Planning and Design: Sketch your enclosure design, decide on component placement, and create a wiring diagram. This step helps visualize the project and identify potential issues.
- Enclosure Construction: Cut and assemble your chosen enclosure material. Ensure all joints are tight and well-sealed to prevent air leaks, which can negatively impact sound quality. Create openings for speakers, control knobs, switches, and charging ports. For ported designs, carefully calculate and construct the bass reflex port.
- Wiring the Electronics:
- Speakers: Solder speaker wires to your drivers, observing correct polarity (positive to positive, negative to negative).
- Amplifier: Connect the speaker wires to the amplifier’s output terminals.
- Bluetooth Module: If separate, connect its audio output to the amplifier’s input.
- Battery System: Carefully wire your battery cells in series/parallel as planned. Connect them to the BMS, ensuring all balance wires are correctly attached.
- Power: Wire the battery pack (via the BMS) to the amplifier and Bluetooth module. Incorporate your power switch and charging jack into the power circuit. A ground loop isolator should be wired between the Bluetooth module and amplifier’s audio input if buzzing occurs.
- Initial Testing: Before final assembly, perform a basic test. Power on your speaker, pair it with a Bluetooth device, and play some music at a low volume. Check all connections for sound, and use a multimeter to verify correct voltages if troubleshooting.
- Final Assembly and Sealing: Secure all components within the enclosure. Use hot glue or silicone to seal any remaining air gaps around speakers, ports, and internal wires. Mount your controls, charging port, and any LED indicators. Attach protective feet and a handle if desired.
Optimizing Sound Quality
Achieving optimal sound involves more than just good components:
- Enclosure Sealing: An airtight enclosure (unless purposefully ported) is crucial for tight bass response and preventing unwanted vibrations.
- Speaker Placement: Experiment with driver placement within your enclosure (if not predetermined by design) to find the sweet spot that offers the best sound dispersion.
- Port Tuning (for ported enclosures): If you opt for a ported design, the length and diameter of the port must be carefully calculated and tuned to the speaker drivers for optimal bass extension.
Troubleshooting Common Issues
- No Sound: Double-check all wiring connections, especially speaker polarity and power connections to the amplifier and Bluetooth module. Ensure the Bluetooth module is correctly paired.
- Buzzing or Hissing: This is often a ground loop issue. Installing a ground loop isolator between the Bluetooth module and amplifier usually resolves this. Also, ensure all audio signal wires are shielded and kept away from power wires.
- Short Battery Life: Verify your battery capacity (mAh) and that the BMS is not prematurely cutting off power. Ensure the amplifier is efficient (Class-D) and that there are no parasitic drains.
- Distortion at High Volume: Your amplifier might be underpowered for your speakers, or the speakers might be exceeding their power handling. Check impedance matching.
Care and Maintenance
- Battery Charging Habits: For Li-ion batteries, avoid completely draining them or leaving them at 100% charge for extended periods if possible. Charge as needed. Use only the recommended charger.
- Cleaning: Use a soft, dry cloth to clean the exterior. Avoid harsh chemicals or excessive moisture, especially if your speaker is not water-resistant.
- Storage: Store your speaker in a cool, dry place. If storing for a long time, ensure the battery is at a moderate charge level (around 50-60%).
Conclusion
Building your own Bluetooth speaker from scratch is an incredibly rewarding endeavor, transforming a collection of components into a personalized audio system that sounds exactly how you want it to and looks uniquely yours. From selecting the perfect drivers and a powerful, efficient amplifier to designing a resonant enclosure and mastering the intricacies of battery management, each step offers an opportunity to deepen your understanding of audio electronics. By following the guidelines for component selection, assembly, and maintenance, you can create a high-quality, durable Bluetooth speaker that delivers exceptional sound for years to come. What unique design will you bring to life?
Frequently Asked Questions
What is the most challenging part of building a DIY Bluetooth speaker?
For many, the most challenging aspect is often the woodworking or enclosure construction, particularly achieving precise cuts and an airtight seal for optimal acoustics. Wiring the electronics can also be daunting, especially when dealing with battery management systems, but a clear schematic and careful soldering can simplify the process.
Can I use old car speakers for my DIY Bluetooth speaker?
Yes, you can often use old car speakers, especially full-range coaxial types, for a budget-friendly DIY Bluetooth speaker. However, be aware that car speakers are typically designed for open-air environments (like a car door) and may not perform optimally in a small, sealed enclosure without specific acoustic considerations. Ensure their impedance (usually 4 ohms) matches your amplifier.
How do I prevent buzzing or interference in my DIY Bluetooth speaker?
Buzzing or interference, often referred to as a “ground loop,” commonly occurs when the amplifier and Bluetooth module share a power source. To prevent this, integrate a ground loop isolator between the Bluetooth module’s audio output and the amplifier’s audio input. Additionally, ensure all wiring is neatly organized and shielded from potential electromagnetic interference.
What is the ideal battery setup for a portable DIY Bluetooth speaker?
For most portable DIY Bluetooth Speakers, a lithium-ion 18650 battery pack (e.g., 2S1P to 4S2P configuration) is ideal due to its high energy density. The specific “S” (series) and “P” (parallel) configuration will depend on your amplifier’s voltage requirements and your desired battery capacity (runtime). Always use a Battery Management System (BMS) for safety.
How important is the enclosure in a DIY Bluetooth speaker?
The enclosure is critically important, acting as an acoustic chamber that profoundly affects the speaker’s sound quality, especially its bass response and clarity. A well-designed, rigid, and properly sealed enclosure prevents unwanted vibrations and air leaks, allowing the drivers to perform optimally. Materials like plywood or MDF are popular for their acoustic properties.